

User flows wrap up the ideation phase. At this point, you should have clearly defined problems and outlined solutions ready to test. It’s time to connect the dots and break it down into a set of steps that the user will need to take to achieve their goal.
This method enables the team to get into the mind of the user and identify their pain points, along with opportunities to create new or improved user experiences. It is also a gateway to creating a prototype in the next step of the process.
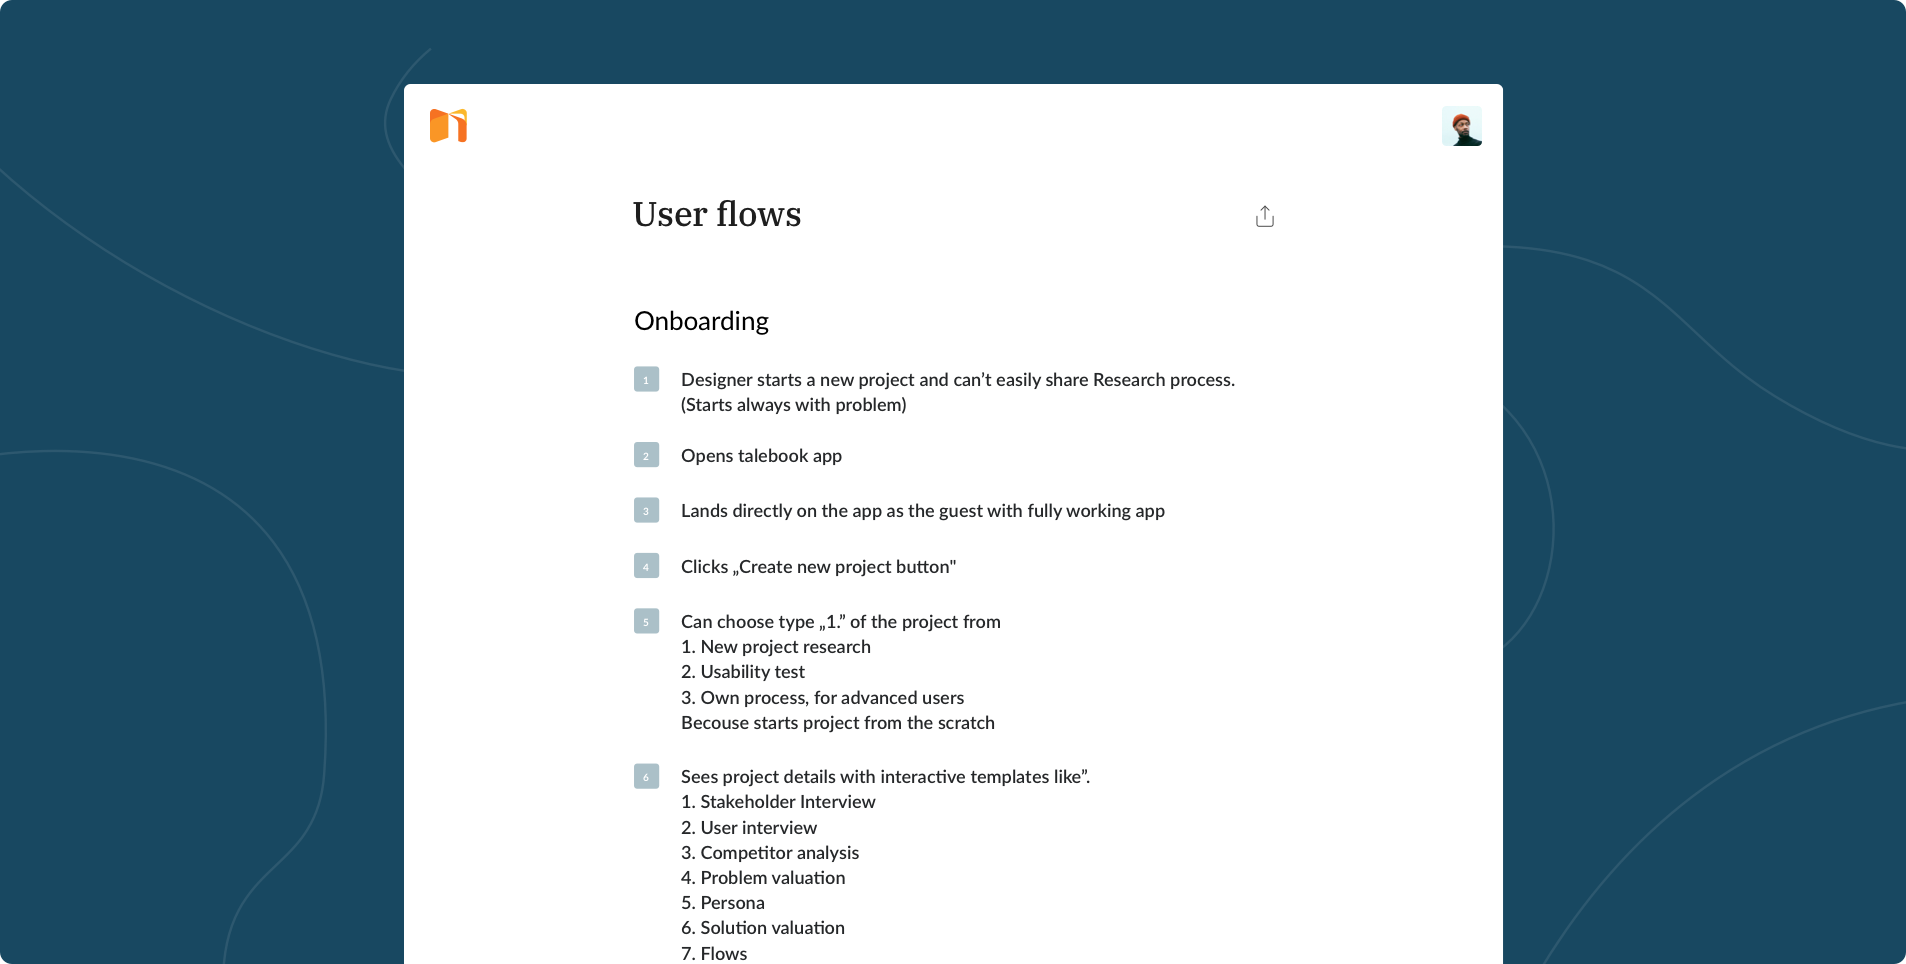
Step by step guide
Start with the first point of contact
The user flows should start with the user’s first interaction with your product. For example, it can be watching an ad on Facebook.
This first step gives context to the whole flow and helps you understand the user better. For instance, if the user interacts with the product for the first time on their hurried commute to work, your flow should be adequately short and easy to get through. Having a persona should give you a clear picture of how this interaction will look.
Add the last step, which is achieving a goal
Each flow should end up where the user reaches his goal. These goals may differ depending on the type of user, but at this point, focus on one specific persona – choose the most crucial target audience at the moment.
Add all steps in-between
Think of the steps the user has to take to accomplish his goal. What data does he have to provide? Does he need to register? What do you need to know from him?
Add a description to each step and pay attention to potential problems that the user may face.
Add up to 3 lines of description to each step. Consider what potential problems may arise. What may discourage the user from moving on? Is this step confusing? Answer those questions as soon as possible because if they can think of any potential issues, it is highly likely that users will encounter them.
Advantages
Understanding the complete user flow
The user journey lets you identify all possible points of contact with the product. And it’s best to get this understanding before you start working with the actual screens.
Collecting content requirements
By understanding users’ needs, the product team can build a flow designed to meet those needs, ensuring that there are just enough steps taken to meet them and to create a positive user experience.
Identifying red routes
When you consider all the possible paths that the user can take, you will be able to extract those that are essential for the product to succeed. These paths are called “red routes” and identifying them helps you build, optimize, and prioritize features that bring the most value.Tips
Create (ideally) from 3 to 8 steps of the user flow, including:
- Beginning of interaction – it can be an online article or a Facebook ad.
- Steps that lead directly to the goal – for example, the steps in e-commerce could be category choice, product details, purchase, shipping data, etc.
- Solution – achieving the goal, for example, making a purchase.
Focus on one flow at a time
If you can’t gather the team to do the exercise at the same time, it’s also possible to do it asynchronously. Just send them an email with step by step instructions to input their ideas within a set deadline.
Stay focused on the problem
Focus on one path the user will take. It should be relatively simple and based on prior research.
Conclusion
A ready user flows is a great tool for communicating the entire user route and getting a better sense of solution complexity. It’s also something that can really easily resonate with your team. Getting a good sense of the problem and the necessary steps to achieve your goal will be helpful in the prototype exercises.